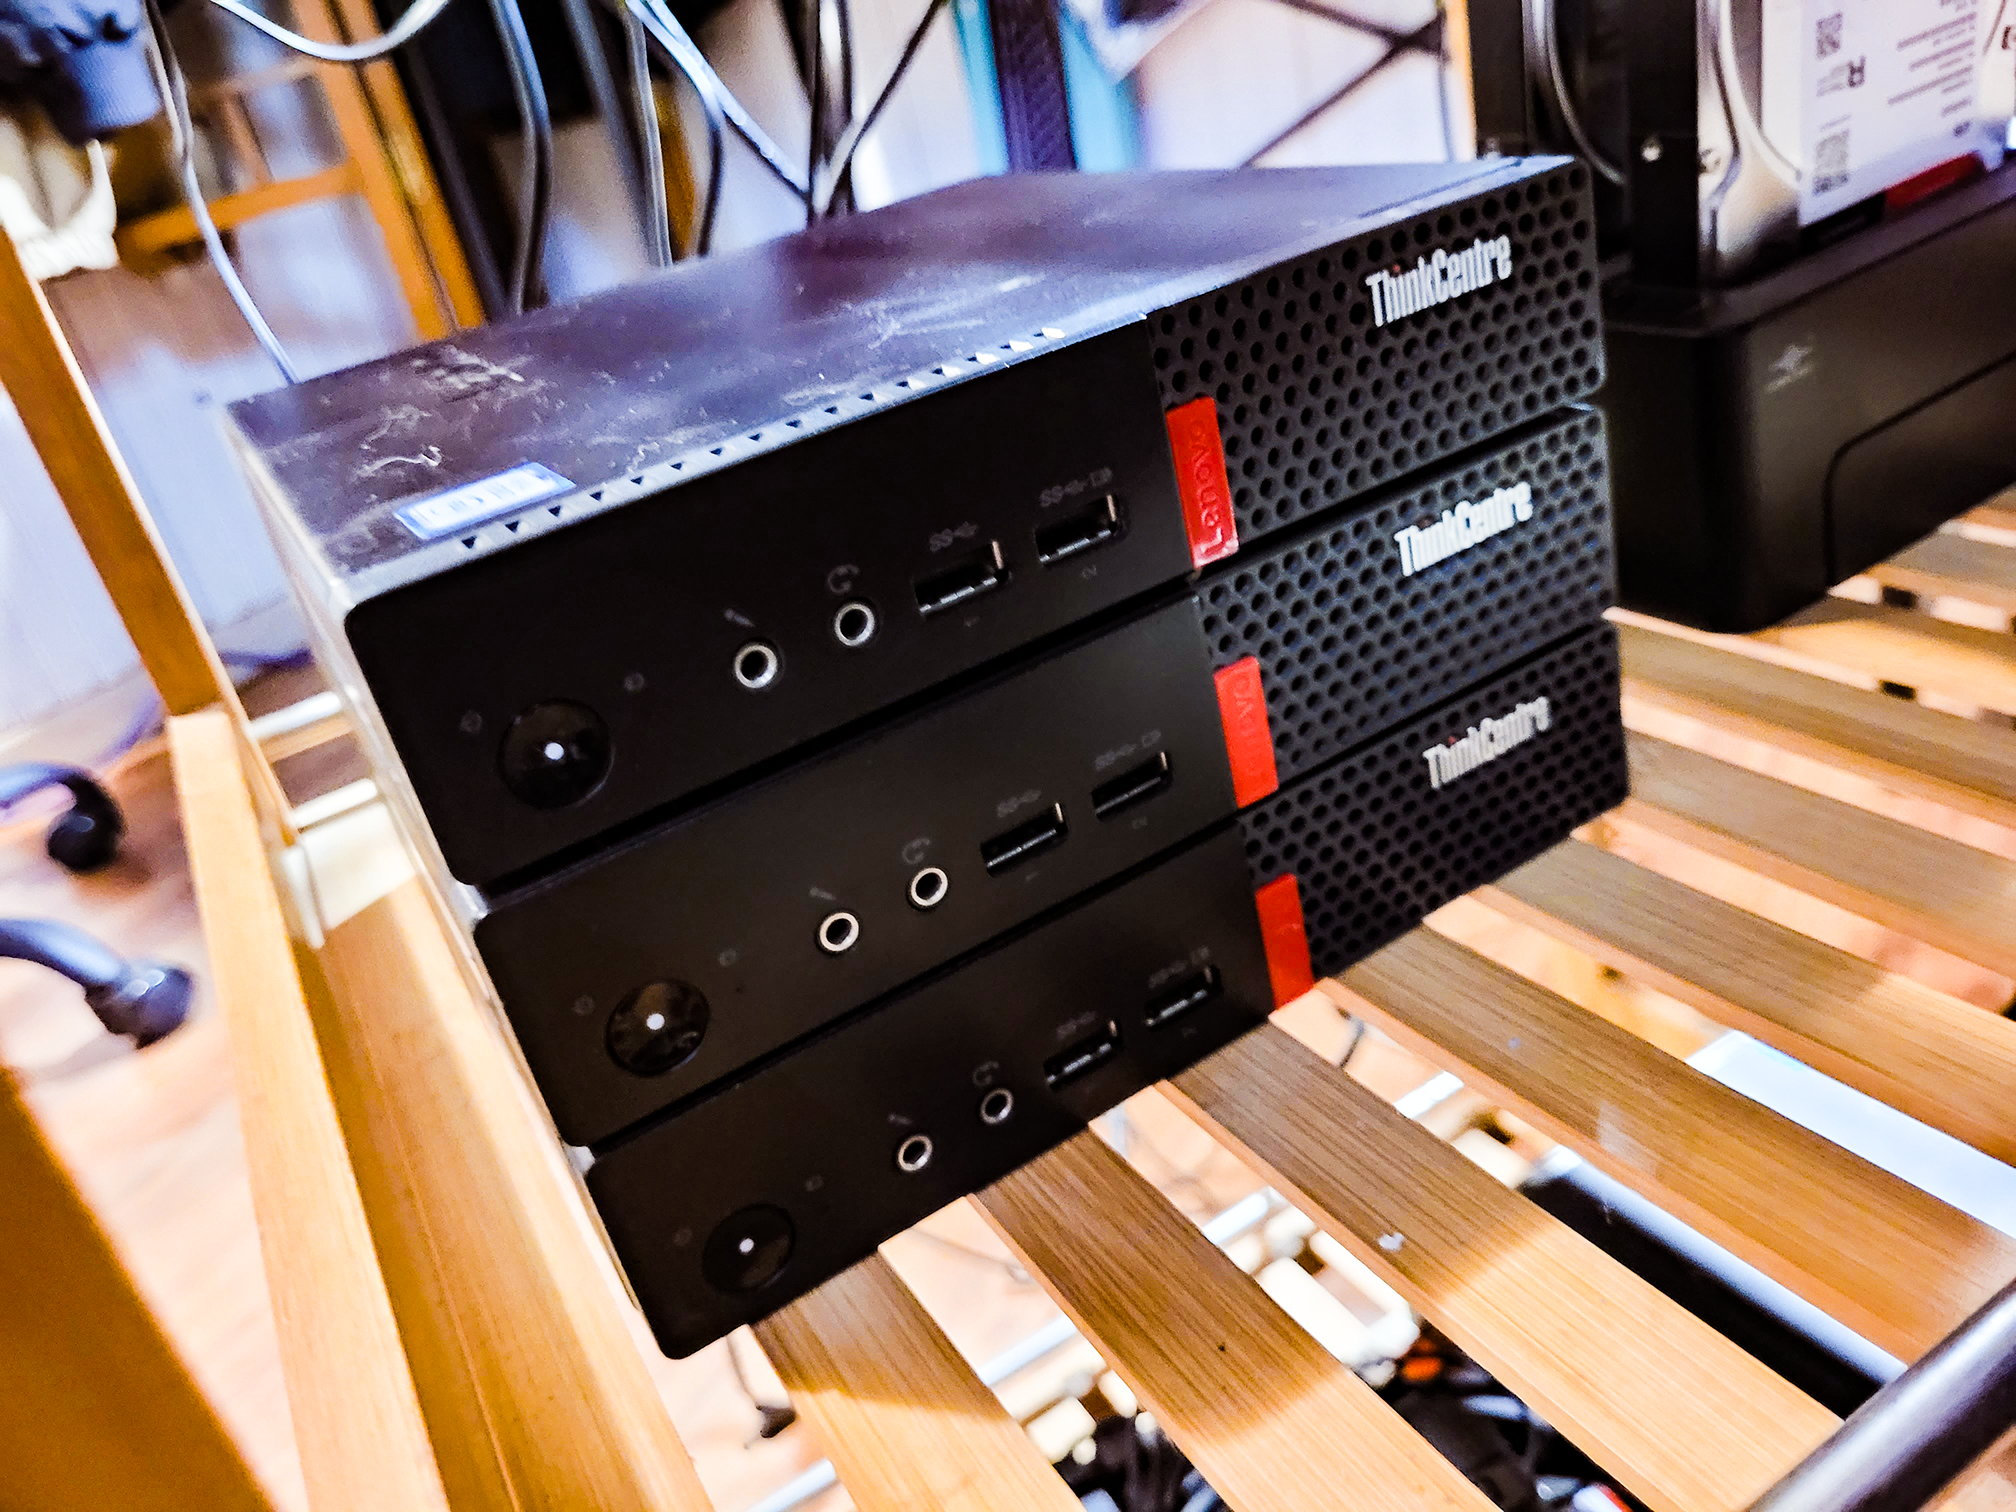
Let me take you on a nerdy, messy, glorious journey of how I built my very first Proxmox VE cluster using three surprisingly capable Lenovo ThinkCentre M710q Tiny PCs. Spoiler alert: There was swearing, Googling, and some “aha!” moments. You know, the usual homelab experience.

The Specs (a.k.a. “the cast”)
- 3x Lenovo ThinkCentre M710q 10MQ
- Core i3 6100T / 3.2 GHz
- 8 GB RAM (currently)
- 256 GB SSD (currently)
- All three are getting 32 GB RAM + 1 TB SSD upgrades soon because obviously, I want this cluster to scream.
I affectionately call them: ClusterA, ClusterB, and ClusterC. Yes, original.
Why Proxmox?
Because I wanted to add an additional robust, open-source virtualization platform to my existing Linux infrastructure. Plus, I like learning new tech and breaking things before I learn how to fix them. My plan? Run local VMs, containers for internal services and eventually host a local clustered LLM.
Step-by-Step Setup
Step 1: Install Proxmox VE on Each Node
I downloaded the latest ISO and flashed it onto a USB stick using Rufus. Installed Proxmox on all three nodes, went with terminal install.
Heads-up: When Proxmox installs, it expects a working DNS and FQDN. Make sure your /etc/hosts and hostname are properly configured before joining nodes.
Pain Level: 1/10
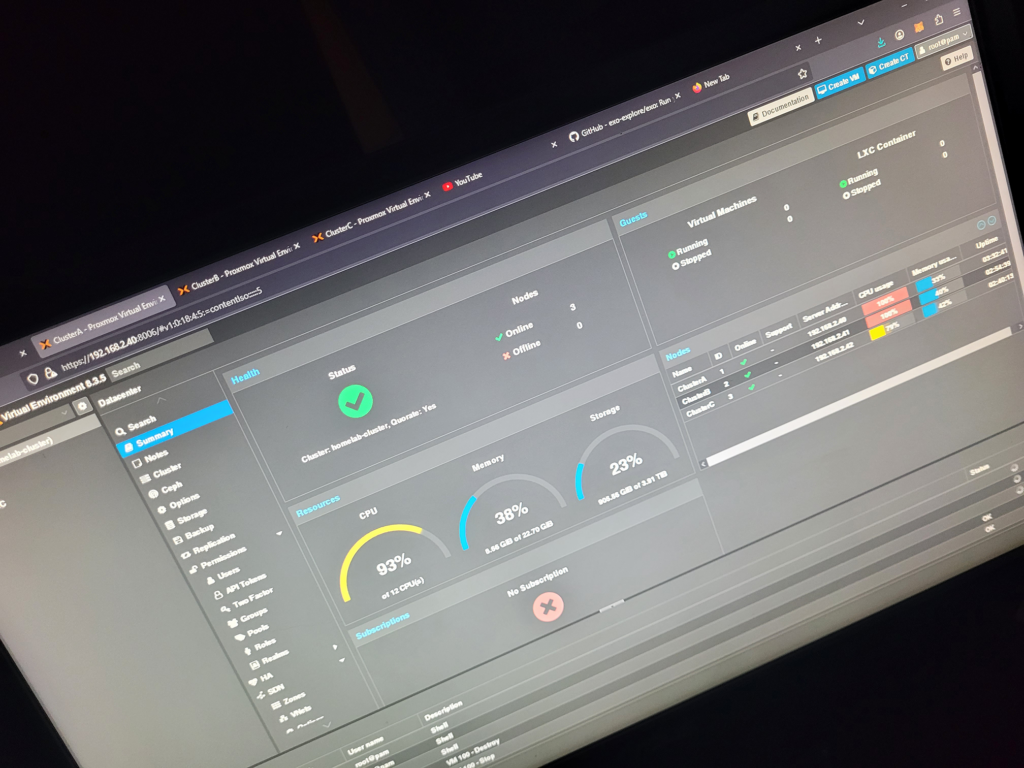
Step 2: Initial Web UI Setup on ClusterA
- Logged into
https://192.168.2.40:8006(ClusterA) - Created the root password, accepted self-signed certs, and was officially in the Proxmox club
- Added subscription warning bypass because I’m a rebel without a budget
nano /etc/apt/sources.list.d/pve-enterprise.list
# comment out the enterprise repo
Then updated and upgraded:
apt update && apt full-upgrade -yStep 3: Create the Cluster
On ClusterA:
pvecm create homelab-clusterIt spat out a join key.
On ClusterB and ClusterC:
pvecm add 192.168.2.40Pain Level: 1/10
Step 4: Shared Storage (Skipped for Now)
Originally planned to set up Samba or NFS shared storage but decided to defer until after the RAM + SSD upgrades. Proxmox supports many storage backends, so I’ll revisit this soon with Ceph or a dedicated NAS.
Step 5: Connecting to Existing Samba Share
This was trickier than expected. Proxmox doesn’t include the cifs-utils package by default. So I had to install it:
apt install cifs-utilsThen mounted it with credentials:
mount -t cifs //192.168.2.X/myshare /mnt/myshare -o username=me,password=secretWhat Can This Cluster Do Now?
- Run local VMs (Linux, Windows, utility appliances)
- Host Docker containers via LXC or nested VMs
- Self-host services like Git, Apache, internal dashboards
- Potentially run a local AI model with Exo distributed across all three nodes (This did not go so well)
Future Plans
- Install 32 GB RAM and 1 TB SSDs in each node
- Set up shared storage using TrueNAS or Ceph
- Add an external GPU to one node for AI acceleration
- Run Deepseek or Mistral on Exo across all nodes
- Build an internal dashboard to control my local AI overlord
This was my first real dive into Proxmox clustering, and while it was intimidating at first, it quickly became addictive. There’s something deeply satisfying about watching three little i3 machines become more than the sum of their parts.
If you’re even remotely considering a Proxmox cluster: do it. Break it. Fix it. Learn it. It’s worth it.
Shoot me a message if you need help setting up a similar system.