In my latest upgrade to my home lab, I set out to build a reliable and redundant network storage solution for my media server. My goal was to create a setup that would be simple to manage, fast, and redundant enough to handle heavy workloads and sudden failures. With just a bit of terminal work, and about 5-10 minutes of focused setup time, I had a RAID 1 array up and running as my main media storage hub.

Hardware and Cost Breakdown
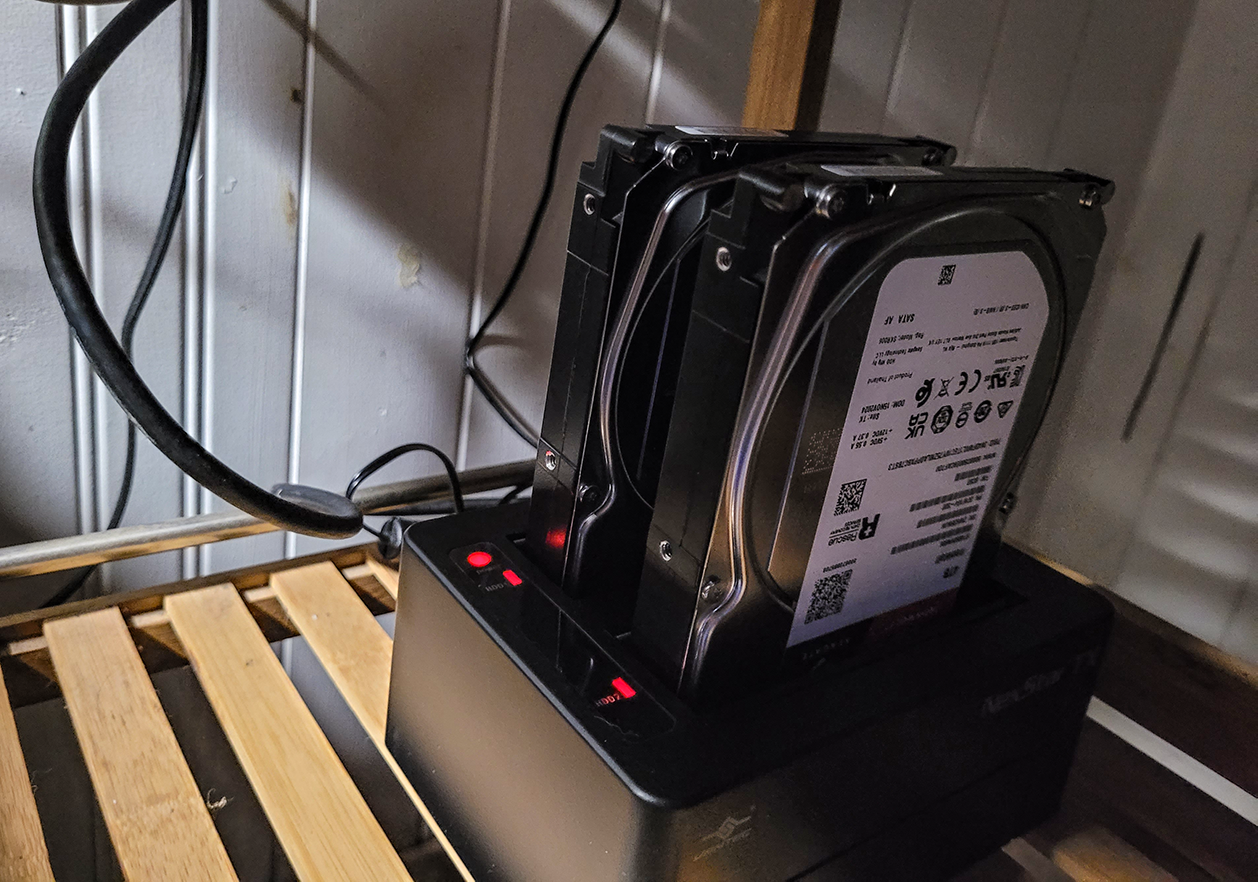
- Drives: 2x Seagate IronWolf NAS 4TB
- Docking Station: Vantec NexStar Dual-Bay USB 3.0 Hard Drive Dock
- Total Cost: $373 CAD (drives + dock)
This affordable setup delivers great performance and reliability, perfect for a home media server or a small self-hosted network storage system.

Why RAID 1?
RAID 1 mirrors your data across two drives, giving you redundancy in case one fails. Sure, it means you “lose” 4TB of usable space, but the trade-off for peace of mind is well worth it. If one drive dies, the other keeps your system running while you replace the failed disk.
Setup Overview
OS: AlmaLinux 9
Drives: /dev/sdb and /dev/sdc
RAID Level: RAID 1 (Mirrored)
Filesystem: XFS
Mount Point: /mnt/raid
Management: Cockpit + Terminal (mdadm)
The whole setup took around 5-10 minutes to configure, with RAID synchronization completing in about 6 hours.

Step-by-Step Setup
1. Install Required Tools
sudo dnf install -y mdadm xfsprogs lvm2 cockpit cockpit-storaged2. Identify the Drives
Use lsblk or fdisk -l to find your two 4TB drives (e.g., /dev/sdb and /dev/sdc).
*Make sure to insert your actual drives
3. Wipe the Drives
sudo wipefs -a /dev/sdb
sudo wipefs -a /dev/sdc
sudo sgdisk --zap-all /dev/sdb
sudo sgdisk --zap-all /dev/sdc
4. Create the RAID 1 Array
sudo mdadm --create --verbose /dev/md0 --level=1 --raid-devices=2 /dev/sdb /dev/sdc5. Monitor Synchronization
cat /proc/mdstatThis took around 6 hours on my setup.
6. Save RAID Configuration
sudo mdadm --detail --scan | sudo tee -a /etc/mdadm.conf
sudo dracut --force
7. Format the RAID Array
sudo mkfs.xfs /dev/md08. Mount the RAID Array
sudo mkdir -p /mnt/raid
sudo mount /dev/md0 /mnt/raid
9. Set Persistent Mount
echo "/dev/md0 /mnt/raid xfs defaults,nofail 0 2" | sudo tee -a /etc/fstab10. Create Folder Structure
sudo mkdir -p /mnt/raid/{Movies,Music,Documents,Backups,Software,Shared}
sudo chmod -R 777 /mnt/raid
11. Give User Full Access (Optional)
sudo chown -R rzasharp:rzasharp /mnt/raidPerformance Overview
- Connected Server Speeds: ~3–5 Gb/s via USB 3.0
- Network Speeds: ~1 Gb/s (bottlenecked by my LAN)
Despite the network limitation, transfer speeds have been very stable — and fast enough for general storage, streaming, and backups.
RAID Uses on My Network
- Backups from VPSs
- Jellyfin Media Libraries
- qBittorrent Download Directory
- Samba-Shared Folders to Network Clients
This RAID drive has become the core storage for my media and infrastructure. Everything from media streaming to automatic backups now funnels through this redundant array.
RAID Management: Cockpit vs Terminal
With Cockpit’s Storage plugin, the RAID array is fully supported and visible through a sleek UI. While I appreciate the interface for quick checks, I personally prefer managing core systems like RAID with the command line using mdadm — it’s fast, clear, and gives me complete control.
Performance Overview
- Connected Server Speeds: ~3–5 Gb/s via USB 3.0
- Network Speeds: ~1 Gb/s (bottlenecked by my LAN)
Despite the network limitation, transfer speeds have been very stable — and fast enough for general storage, streaming, and backups.
RAID Uses on My Network
- Backups from VPSs
- Jellyfin Media Libraries
- qBittorrent Download Directory
- Samba-Shared Folders to Network Clients
This RAID drive has become the core storage for my media and infrastructure. Everything from media streaming to automatic backups now funnels through this redundant array.
RAID Management: Cockpit vs Terminal
With Cockpit’s Storage plugin, the RAID array is fully supported and visible through a sleek UI. While I appreciate the interface for quick checks, I personally prefer managing core systems like RAID with the command line using mdadm — it’s fast, clear, and gives me complete control.
Setting up a RAID 1 array on AlmaLinux 9 for my media server was smooth, quick, and highly effective. The cost was reasonable, the redundancy is rock solid, and with tools like Cockpit and mdadm, I have both visual and terminal-based control over the system. It’s a small sacrifice losing 4TB to redundancy, but the reliability and peace of mind make it totally worth it.
📷 Stay Tuned
I’ll be including photos of the Seagate IronWolf NAS drives and the Vantec NexStar dock in the blog post — keep an eye out!